Skip to main contentThis guide provides a step-by-step walkthrough to get you from a new account to a fully deployed Large Language Model.
Step 1: Account Setup and Configuration
Your journey begins with setting up your Tensormesh account.
- Authenticate Your Account: You can sign up or log in using your existing GitHub or Google account for streamlined access. Your associated email address will be used for essential communications, including resource access, billing notifications, and platform updates.
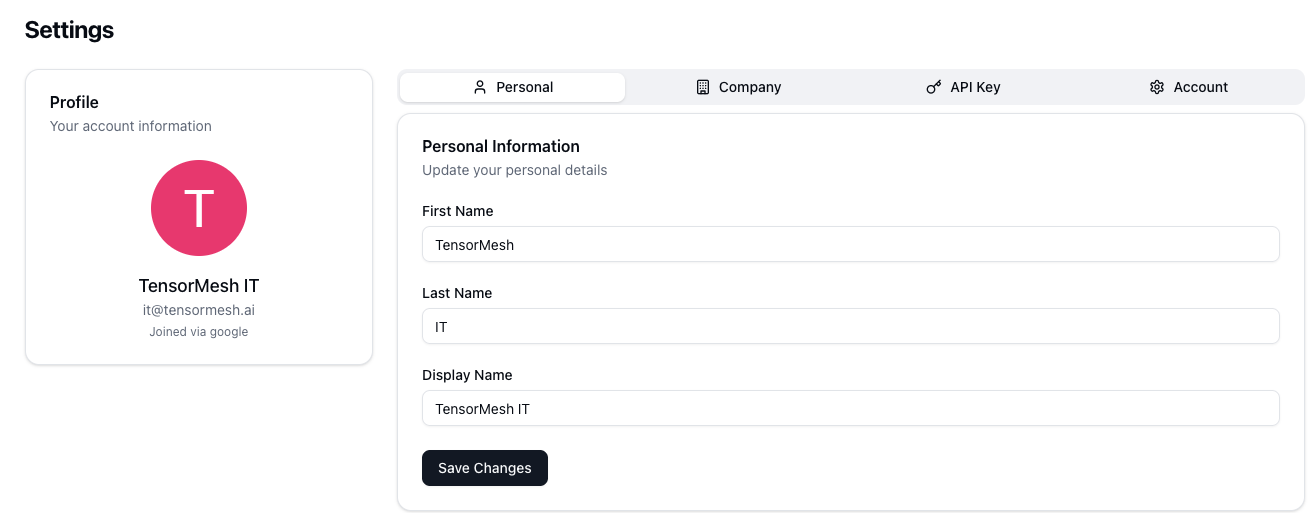
- Complete Your Profile: Once logged in, navigate to the Settings section from the side command panel and select the Personal tab. Please fill in your personal details to complete your profile.
- Provide Company Information: In the Company tab within Settings, enter your organization’s details.
- Secure Your API Key: An API key is automatically generated for your account. You can find this key in Settings > API Key. This key is crucial for programmatic access to your deployed model APIs. Treat it like a password and keep it secure.
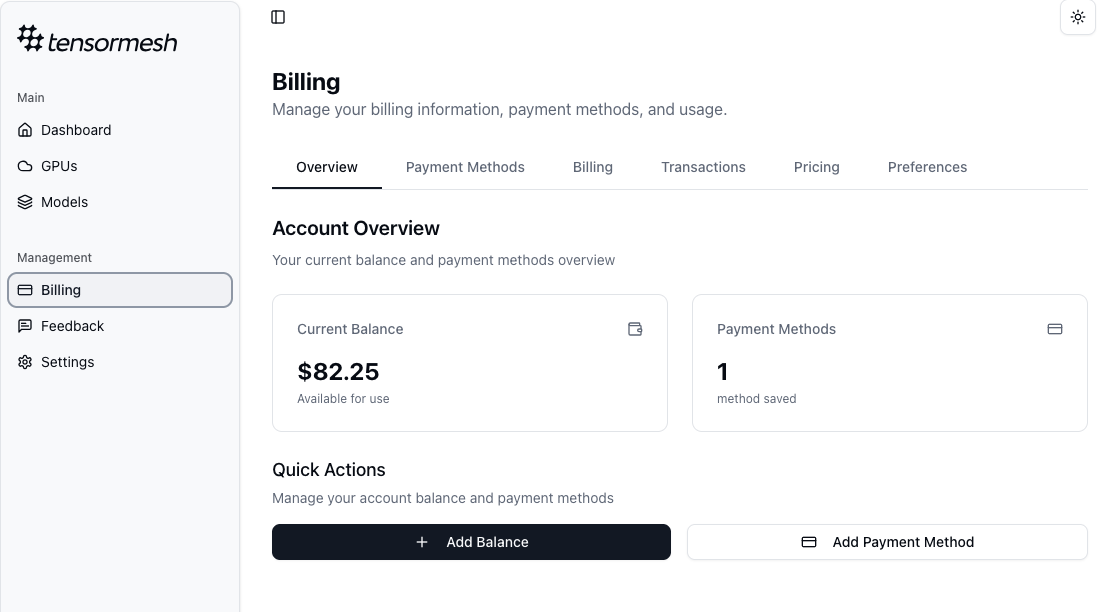
A valid payment method and account balance are required to provision GPU resources.
- Access the Billing Panel: Click on Billing in the left-hand navigation menu.
-
Add a Payment Method: Click the Add Payment Method button and securely enter your credit card information.
-
Add Account Balance: Click Add Balance to load credits onto your account.
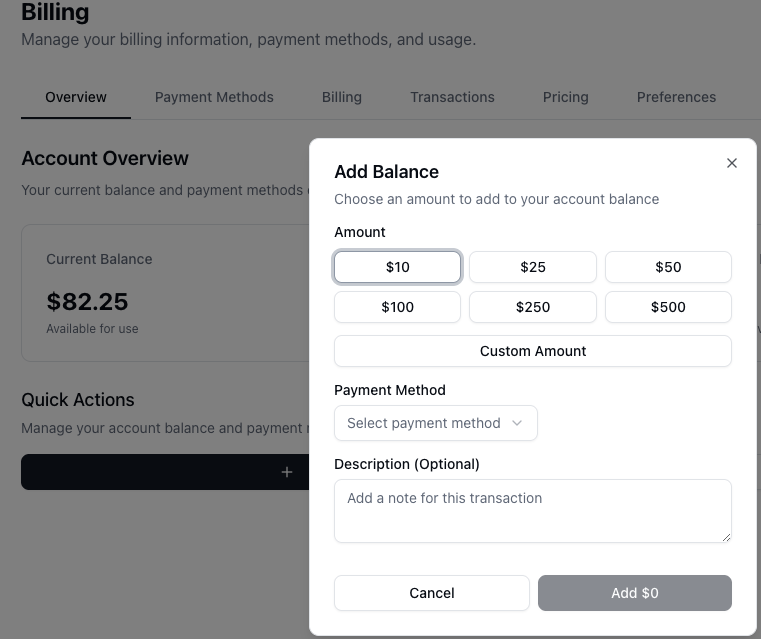 A sufficient balance is necessary to allocate and run GPU instances. If your balance runs out, your active GPU instances will be automatically stopped to prevent unexpected charges. Your complete transaction history is available under the Transactions tab for easy tracking.
Step 3: Allocate a GPU Cluster
With billing in place, you can now provision a GPU cluster to host your models.
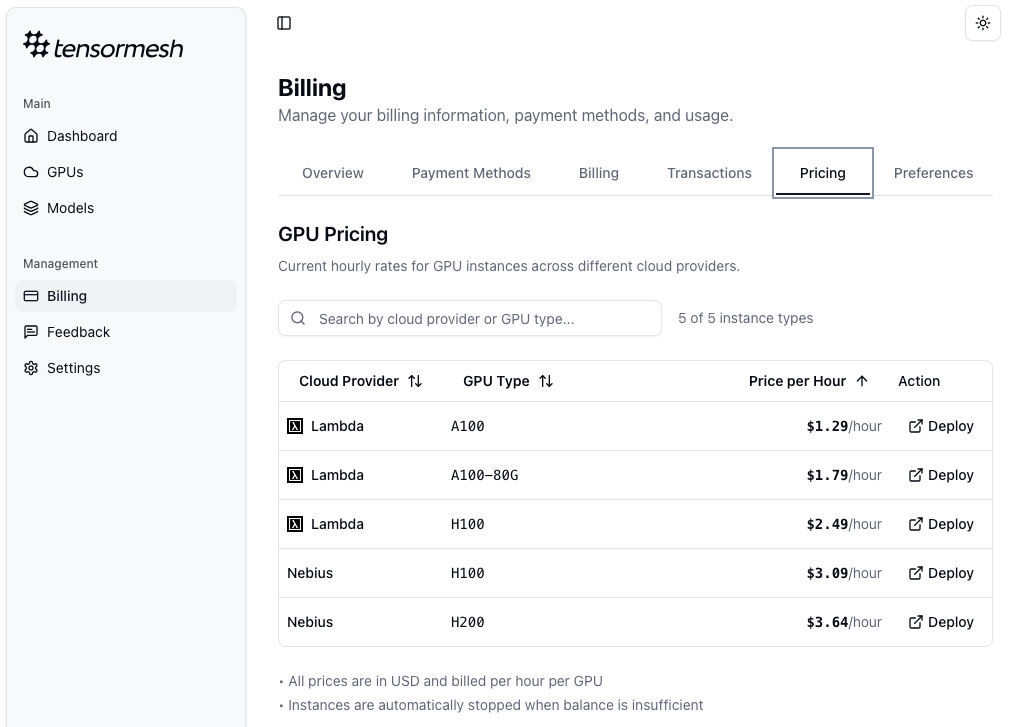
- Browse Available GPUs: Navigate to the GPUs panel. Here you will find a marketplace of available GPU instances from various leading cloud providers. The hourly price for each instance is clearly displayed to help you make an informed decision.
- Allocate Your Instance: Select the GPU instance that best fits your performance and budget requirements, and click Allocate. A confirmation dialog will appear, summarizing the estimated hourly cost. Confirm the action to proceed.
- Manage Your GPU Instances: Your newly allocated GPU will now be listed under the My GPU Instances tab. This dashboard provides a comprehensive overview of its status, provider, region, and accumulated cost.
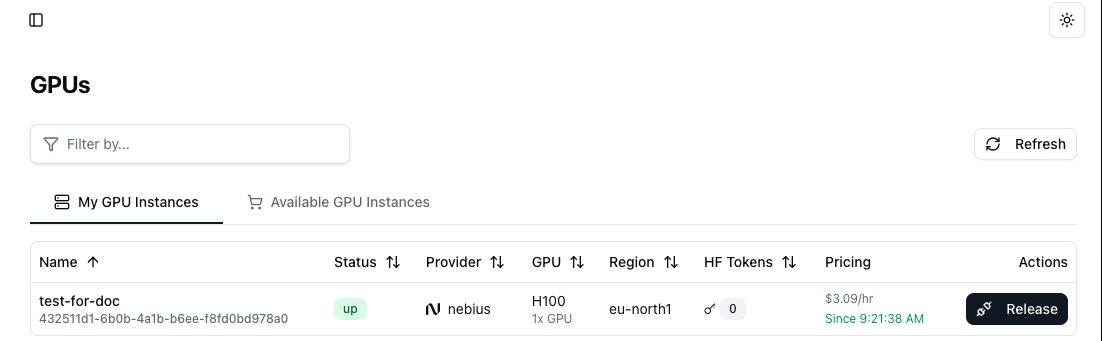 Important Note on Billing: Billing commences the moment you allocate a GPU cluster and continues uninterrupted until you explicitly release it.
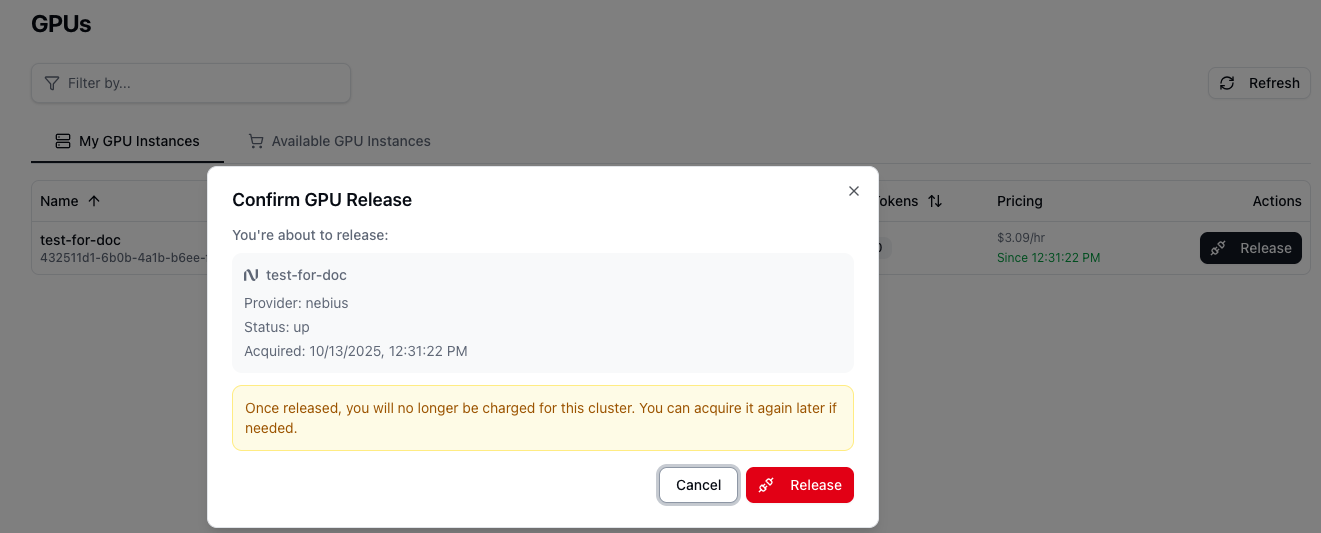
To stop all charges, you must click the Release button next to the instance. This action is irreversible and will permanently terminate the instance.
Step 4: Deploy a Large Language Model (LLM)
With an active GPU cluster, you are now ready to deploy your first model.
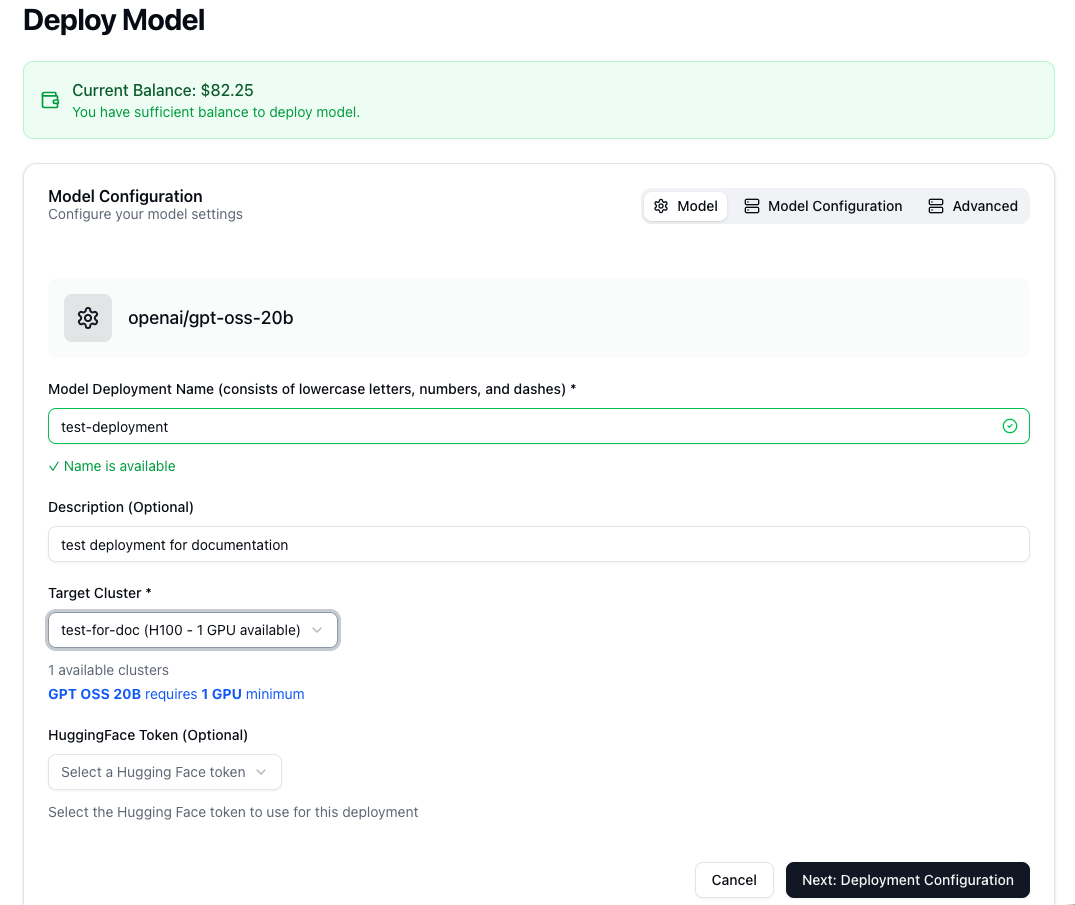
- Initiate Deployment: Go to the Models panel and click the Deploy Model button.
- Choose a Model: You can select from a curated list of popular, pre-configured models for quick deployment.
The ability to deploy your own model will soon be available.
- Configure Your Deployment:
- Model: Assign a unique Deployment Name for easy identification. Select the Target Cluster from your list of acquired GPUs. If the model is private, you can add your HuggingFace Token here. The interface will automatically display the minimum number of GPUs required for the selected model.
- Model Configuration (Optional): This section allows you to fine-tune the resource allocation for your deployment. By default, Tensormesh allocates an optimized number of replicas, CPU cores, CPU memory, and GPUs. While these defaults are suitable for most use cases, advanced users can adjust these parameters to scale the model’s performance and concurrency.
- Advanced (Optional): For expert users, this section offers granular control over the underlying inference engine. You can configure technical parameters for LMCache, vLLM, and the model itself, such as maximum sequence length, concurrent request limits, and tensor parallelism. For a detailed explanation of these settings, please consult the official vLLM documentation.
- Create the Deployment: After reviewing your configuration, click Create Deployment to begin the provisioning process.